The Evergreen Trees of Winter

7062721248 • January 7, 2021

Wisconsin Horticulture

What is winter burn? Winter burn is a common problem of evergreens including those with broad leaves (e.g., boxwood, holly, rhododendron), needles (e.g., fir, hemlock, pine, spruce, yew) and scale-like leaves (e.g., arborvitae, false cypress, juniper) grown in open, unprotected locations and exposed to severe winter conditions. Evergreen plants that are marginally hardy in a location (i.e., not well-adapted to local winter conditions) are at increased risk for winter burn. Winter burn can be so severe that affected plants may die and/or require replacement.

What does winter burn look like? Winter burn symptoms often become apparent as the snow melts and spring temperatures rise. Foliage starts to brown at the tips of branches with browning progressing inward toward the center of the plant. On broad-leaved evergreens, leaf edges typically brown first, followed by browning of entire leaves. Foliage facing south, southwest or west is most often affected. Symptomatic foliage often begins to drop off starting in spring and continuing through mid-summer as new foliage is produced. In extreme cases, entire plants can brown and die.

What causes winter burn? There are many factors that can contribute to winter burn. In general, plants with shallow or poorly-developed root systems that do not efficiently take up water (e.g., recent transplants) are more prone to winter burn. Warm fall temperatures that delay the onset of plant dormancy can also contribute to winter burn. Under such conditions, plants are not prepared for the subsequent rapid onset of freezing winter temperatures, and as a result damage to foliage occurs. Similar cold injury can occur mid-winter when temperatures drop sharply at sunset causing foliage that has warmed during the day to rapidly cool and freeze. In addition, on sunny winter days, foliage (particularly foliage facing the sun) can begin to transpire (i.e., naturally lose water through the foliage). Because the ground is frozen, plant roots cannot take up water and replace the water that has been lost from the foliage. As a result, foliage dries and browns. Foliage under snow or facing away from the sun and direct winds is usually not damaged. Strong winter winds can lead to additional water loss making winter burn more severe. Colder than normal winter temperatures and longer than normal winters can also be factors in the development of winter burn, especially if below normal temperatures occur into April (the time of year when plants normally come out of dormancy and are most susceptible to winter injury). Finally, exposure of plants to salt used to deice roads, driveways and sideways during the winter can make plants more prone to winter burn injury.

How do I save a plant with winter burn? For evergreens such as arborvitaes, boxwoods, junipers and yews, prune out dead, brown, damaged or dying tissue in mid-spring after new foliage is produced. If new foliage has not yet emerged by spring, scratch the bark on affected branches and look for green tissue underneath. Also gently peel back the bud scales to look for inner green bud tissue. If the stem or bud tissue is green, buds on the branch may still break to form new foliage. If the tissue is brown, the branch is most likely dead and you should prune the branch back to a live, lateral bud or branch. Such buds and branches may be far back inside the canopy and pruning may remove a substantial amount of the plant. Pines, spruces and firs typically produce new growth at branch tips in spring that will replace winter burn-damaged needles, and thus pruning may not be required on these evergreens. After a couple of growing seasons, new foliage will fill in the areas that were damaged. If an entire evergreen is brown, recovery is unlikely and the plant should be replaced with something (e.g., a deciduous shrub or tree) that is better-suited to the site.

How do I avoid problems with winter burn in the future? Use a variety of strategies to prevent winter burn before winter arrives. Plant the right plant in the right place. Buy plants that are rated as cold hardy for your location and are well-adapted to local growing and soil conditions. Plants exposed to drying winter sun and winds are more likely to be injured. Therefore, avoid planting winter injury sensitive evergreens, particularly those that require shade or that are marginally cold-hardy, in exposed, sunny, windy areas. Plant them on the northeast or east side of a building or in a protected courtyard. Plant boxwoods, hemlocks, rhododendrons, and yews in partial shade to provide them added protection from winter sun and wind.

Plant evergreens at the right time of year. Optimally plant evergreens either in early spring (before buds break) or in late summer (i.e., August through September). Evergreens can be planted in the summer if you provide supplemental water. Avoid planting after early October in northern Wisconsin and after mid-October in southern Wisconsin as this will not allow sufficient time for roots to grow adequately before the ground freezes.

DO NOT prune evergreens in late summer or early fall. Late season pruning of some non-native evergreens may encourage a flush of new growth that will not harden off properly before winter.

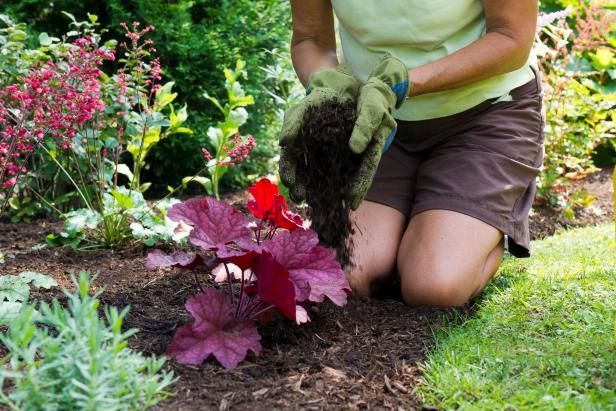
Mulch evergreens properly. Apply two inches (on clay soils) to four inches (on sandy soils) of loose mulch (e.g., shredded hardwood, pine, or cedar bark; leaf compost; or wood chips) around the base of evergreens out to at least the drip line (e.g., the edge of where the branches extend). Keep mulch at least three inches away from the trunks of trees and the bases of shrubs. Proper mulch insulates roots from severe fluctuations of soil temperatures and reduces water loss. It also helps protect roots from injury due to heaving that occurs when soils go through cycles of freezing and thawing during the winter. Heaving can especially be a problem for shallow-rooted and newly planted evergreens. DO NOT mulch excessively or too close to plants as this can lead to damage by providing shelter for mice and voles (which can girdle trunks and branches) and by providing a favorable environment for disease development as well as insect activity and feeding.

Water plants properly. Plants that are well-hydrated are less prone to winter burn. In particular, newly planted or young evergreens, especially those planted in open, exposed sites, those planted under eaves, or those planted in dry falls may suffer severe moisture loss during the winter and consequently severe winter burn. Established evergreens should receive approximately one inch of water per week and newly transplanted evergreens up to two inches of water per week during the growing season up until the soil freezes in the autumn or there is a significant snowfall. If supplemental watering is needed, use a soaker or drip hose to apply water near the drip lines of plants rather than using a sprinkler.

Protect plants during the winter. Use burlap, canvas, snow fencing or other protective materials to create barriers that will protect plants from winter winds and sun. Install four to five foot tall stakes approximately two feet from the drip lines of plants especially on the south and west sides (or any side exposed to wind) and wrap protective materials around the stakes to create “fenced” barriers. Leave the top open. These barriers will deflect the wind and protect plants from direct exposure to the sun. Remove the barrier material promptly in spring. DO NOT tightly wrap individual plants with burlap as this can collect ice, trap moisture and make plants more susceptible to infection by disease-causing organisms. Use of anti-transpirant products to prevent water loss from foliage over the winter has been shown to have limited benefit. These materials degrade rapidly, require reapplication after each significant rain or snow event, and may not be effective in preventing water loss that can lead to winter burn.

Source: https://hort.extension.wisc.edu/articles/winter-burn/

 We look forward to seeing you in Spring!! Call us with any questions or to book your spring/summer landscaping appointment!! 920.462.7041

By 7062721248 April 28, 2025
The body content of your post goes here. To edit this text, click on it and delete this default text and start typing your own or paste your own from a different source.
By 7062721248 April 24, 2025
Gardens are growing, and so are the trends shaping them. From eco-savvy native gardening designs to responsibly sourcing your seeds and plants, our experts share their top trends for 2025. Whether you're a green gardener or green-thumbed pro, these hot takes will provide endless inspiration. Meadow mania
 The “meadow” or “prairie” approach to landscaping is blossoming in popularity as gardeners embrace eco-conscious ways to design their spaces. By incorporating native plants like little bluestem, Echinacea, and Rattlesnake Master alongside adaptable non-natives such as Russian sage and yarrow, homeowners are creating vibrant, climate-resilient landscapes. A standout for 2025 is short-toothed mountain mint (Pycnanthemum muticum), the Perennial Plant of the Year. This native gem is drought-tolerant and a magnet for pollinators—a perfect addition to meadow-style gardens. To achieve this look, start by reducing lawn space and planting a mix of hardy perennials, grasses, and wildflowers in natural groupings. Unlike traditional gardens, this “dry and wild” method requires less water, reduces maintenance, and fosters biodiversity. With its relaxed charm and environmental benefits, the meadow approach is a win for gardeners and ecosystems alike.
 Short and sweet Short-blooming plants are lovely additions to gardens, offering a compact, tidy look while providing essential resources for pollinators. These plants work beautifully as borders between garden beds and lawns, helping transition from taller plants to neat, manicured grass. Species like Pussytoes (Antennaria neglecta), Prairie Smoke (Geum triflorum), and Jacob’s Ladder (Polemonium reptans) bloom in spring, but their fascinating, textural foliage enhances the landscape long after the flowers fade. Adding a blend of low-growing grasses and wildflowers offers a meadow-like appearance, which can be styled to look more structured or intentionally wild. With proper care, this design approach provides vibrant color and texture throughout the seasons, benefiting both the aesthetic of your yard and the local ecosystem.
 Milkweed for a butterfly bonanza As the U.S. Fish and Wildlife Service considers listing monarch butterflies as endangered, gardeners have a chance to help save this iconic species. Monarchs continue to decline due to habitat loss, pesticide use, and climate change, which have destroyed their breeding grounds and reduced milkweed—their essential host plant. 
 By planting more milkweed, homeowners can create vital habitats to support monarchs and help reverse their decline and ensure these beloved pollinators thrive for generations to come. Above all, if you're interested in maximizing the enjoyment of YOUR yard call us today to schedule your free landscape consultation and let us help you bring your gardening desires to life! Source: https://www.chicagobotanic.org
By 7062721248 May 30, 2024
Landscaping Ideas for an Enchanting Outdoor Space
By 7062721248 July 17, 2023
Just because you have a smaller plot doesn't mean you can't make it stand out. Maximize the impact of a minimal landscape with these small garden, front yard, and backyard garden ideas.
By 7062721248 July 13, 2023
Garden of Eden The wild, earthly, Garden-of-Eden vibe is going to be big for gardens this year. So how do you translate that aesthetic to your own backyard? For starters, try mixing in edible plants with the rest of your landscape—don't just contain them to raised beds. This trend is also all about nurturing nature by incorporating pollinator- and bird-friendly plants, using organic products, and being mindful of soil health.
By 7062721248 July 7, 2023
Landscaping is comprised of five main elements: color, line, texture, form and shape. These elements all work together to form a beautiful landscape design. Understanding each element will help you make good landscaping decisions, so we’ve outlined the ways each element can be incorporated into a design: 1. Color While all of the elements of landscaping are important, color might be the most essential. Color can add dimension, visual interest, and seasonal variety to your landscaping throughout the year. Color doesn’t just apply to the flowering plants you choose; you can also use paving, retaining walls, fences and mulch to add color to your landscape design. 2. Line Line refers to both hardscape and softscape elements, but typically it refers to the more structural features in your garden. Flower beds, walkways, patio perimeters, hedges and arbours can all be used to add lines to your garden and can help to draw attention to certain areas. If you prefer a more formal look, opt for hard lines as curved lines tend to be less formal and more relaxed. 3. Texture In any good design, texture is key. Plants are the best way to accomplish this goal, as the leaves, bark, flowers and branches all add instant texture. However, aggregates, mulch, paving stones, retaining walls and other structural features can also add texture to your garden. Be sure to choose elements with different textures throughout your garden to add visual interest. 4. Form You can think of form as the shape of a plant or other structural object. If you have a formal garden, the forms will be more tailored and manicured, with clipped hedges and defined lines. Informal landscapes tend to have natural forms and rely less on heavy pruning and maintenance. 5. Scale One of the trickiest elements in landscaping design is scale. You want to have a good balance between the size of your garden elements and the size of your home, as well as surrounding homes and public areas. If you have a smaller home, consider choosing elements that are in proportion to the size of your home. A larger home may be able to incorporate larger elements. Understanding these landscaping elements will help you design a landscape that you love! For expert help, contact The Luxury Landscape Co, LLC, for all your design and landscaping needs!
By 7062721248 June 28, 2023
Well, it's past Memorial Day and we're working up to the 4th of July ... here are recommendations of complementary varieties in Red, White and Blue to plants. Red Geranium Red geraniums are a great centerpiece for a fourth of July potted container because geraniums are a floral choice that keeps giving and giving. Geraniums, when deadheaded, can continue to bloom and bloom all summer long. Pair this flower with white alyssum which will also flower all summer, and purple or red salvia plants which add their own pop of color without dominating the combination.
By 7062721248 June 23, 2023
Like the island bed, there are no hard and fast rules for creating a berm. But some simple guidelines can help create a beautiful berm. Berms and island beds can be quite similar, but there are two notable differences. The island bed generally “floats” alone in the landscape, whereas a berms are sweeping hills that alter the landscape. A berm alters and becomes a part of the landscape, often flowing up to or adjoining with other elements of the landscape such as structures or an adjoining hills or a stand of woods. Tapering the berm to the natural ground level also makes it appear a part of the natural landscape, but it is becoming common to see berms walled up. The other primary difference is that an island is generally created on the existing elevation of the property. A berm significantly raises the elevation by building up hills or mounds with soil. If you are considering creating a berm, keep in mind that a surprisingly large quantity of soil is required. Cultivated soil may be cost prohibitive depending on the size and height of the berm you have envisioned. Check with excavating companies in your area, for a reasonable charge you may be able to acquire fill from construction projects such as digging for a new homes’ basement or a swimming pool. Add cultivated soil only on top and dig in to the planting areas where necessary. Purpose of a Berm There are many reasons to create a berm, some very functional, some strictly aesthetic. A functional berm usually becomes aesthetic in its’ finishing. Create interest in a flat landscape Separate functional areas Add a focal point Create a privacy screen Create a wind barrier Create a noise barrier Enhance a design Create a soil depth where soil conditions are unfavorable Elevate plants to a better viewing position Improve or redirect drainage
By 7062721248 June 22, 2023
As homeowners spend more time outdoors, they have a new need for their outdoor space to feel more functional and complete. Whether it’s an outdoor kitchen, garden or pond, we are seeing homeowners lean toward creating more efficient, defined outdoor spaces. Landscapers and gardeners are now looking for ways to connect nature with patios and outdoor spaces to create the perfect spot to unwind and enjoy all the well-being benefits the outdoors provides.
By 7062721248 June 20, 2023
Ready to hide the view of a neighbor's patio, enclose a pool deck or buffer the noise of a nearby street? Many trees and shrubs can be planted tightly to form hedges, groves and screens to offer a solution. Many also add multi-season beauty and support wildlife. The key is to select the right tree for the right place whether shady and wet or cold and windy. Here are some favorites to try.
Show More